Get the kit


Our philosophy is that the best way of learning how to design a haptic device is to start from our default design an eventually deviate from it. Since it is open source you are welcome to do so. The first step is to acquire all the components of the kit. Currently there are no single providers of a physical kit, but we might partner up with distributors if there is sufficient interest, please sign the feeback/buy form to let us know. For now, just follow the instructions below to assemble the kit.


Everything you need is hosted on our GitHub Repository. Below you find description of how to make use of its contents.

Mechanics


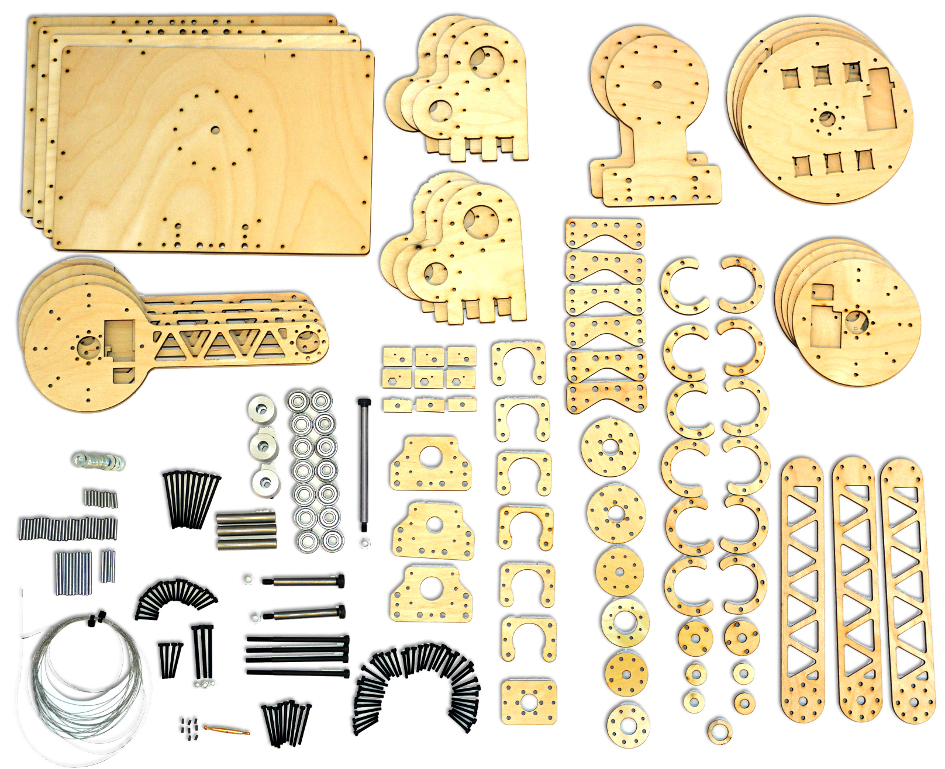
The entire structural pieces are manufactured from a laser cutter out of 6 mm (or approximately 1/4 inch) plywood. To form stiff three-dimensional parts from the flat sheets, several layers are stacked and held together with screws. All holes in the plywood parts are adjusted with sub-millimeter precision such that all screws can self-tap (self-thread) the holes, allowing for quick assembly and disassembly. Stacked parts are aligned by inserting dowel pins (precision cylindrical pins) with an arbor press before adding screws. In fact, there is no use of bondants or adhesives, resulting in a visually and mechanically clean, quickly disassemble-able and reconfigurable device.

We assume here you have prior experience of using a laser-cutter or ordering from a service like cutlasercut.com (that site also have good information on laser cutting in general). In the mechanics/lasercut_drawings folder of our GitHub repository you will find exported drawings in .dxf format. Please follow the instructions in the README.md for details on how to use them.

Motors & Encoders


The default design is based on 3x Maxon RE40 Motors with factory-mounted incremental encoders that can sense the precise change of the motor shaft angle. From the reading of that signal we can compute the current position of the manipulandum (the user handle).

Electronics


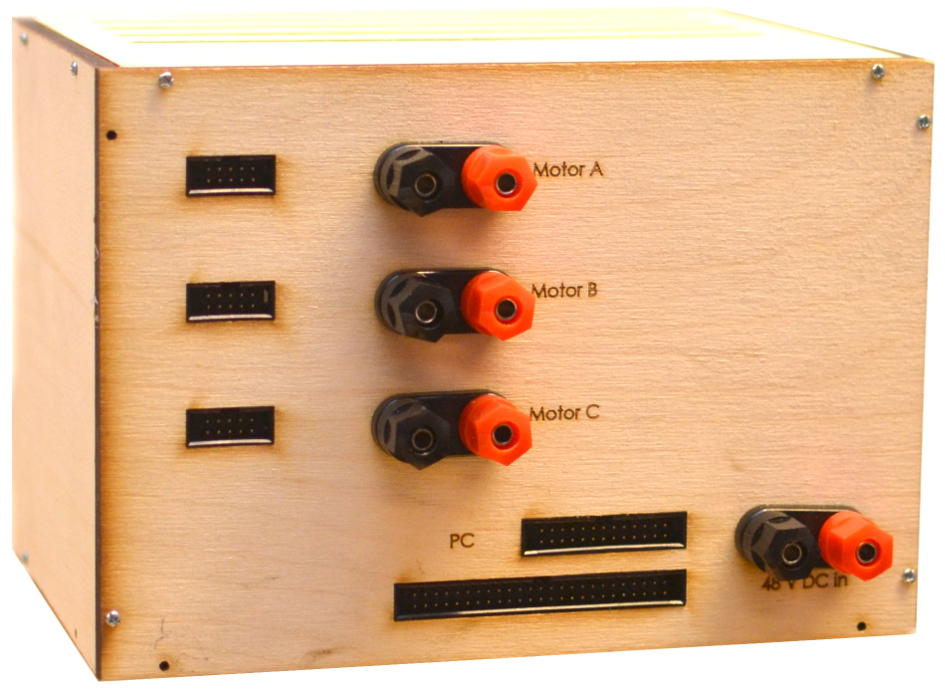
To drive the motors we need a current controller whose current can be set by the computer. We also need to route the signals from the encoders to the computer. We have encapsulated these functions into an Electronics Box. The first iteration of the kit uses the box pictured to the right at the top of this page and is only housing three Maxon ESCON 50/5 Controllers and routing the signals using coupling wires. Assembling one of those boxes is quite time consuming because of the many wires and the design quite inflexible. Therefore we have now moved on to a custom Printed Circuit Board (PCB) described below.

(Click on image to enlarge)
This board, whose schematics and production files are found in the GitHub repository, is currently only doing the same routing as the previous box but uses the PCB Module version of the Maxon 50/5 instead. It also has three encoder driving circuits (converts a differential signal pair into one signal). Then, the board has a socket compatible with your choice between:

  • DAQ Extension Board: Two connector ports for connecting to your Sensoray S826 PCIe DAQ
  • Mbed.org LPC1768: A microcontroller platform

This enables us to support both current operations using a DAQ and seamless transition to the next generation of WoodenHaptics devices using e.g. USB when that is mature.

To fabricate the WoodenHaptics motherboard PCB and the WoodenHaptics DAQ Extension board, send the respective .brd files (found in the repository) to your favorite PCB factory e.g. pcb-pool.com. When they arrive you will have to solder the connectors and the 3 surface mounted encoder drivers.

Software


The device is currently only supported in Linux using a Sensoray S826 DAQ PCIe extension card. As progress is made by the community we expect to switch to USB and other interesting alternatives that can be used by any computer and operating system. For now, you will have to get hold of a Sensoray card (about $600) and use Linux. With that said, setting it up is pretty easy. Just follow our PC/Ubuntu Setup Guide below.

We provide an extension to the Chai3D 3.0.0 C++ haptics & graphics software library. Chai3D comes with a number of demo programs that you can run out of the box with WoodenHaptics as long as you copy in our device files and recompile, as instructed below.

Configure Your Device

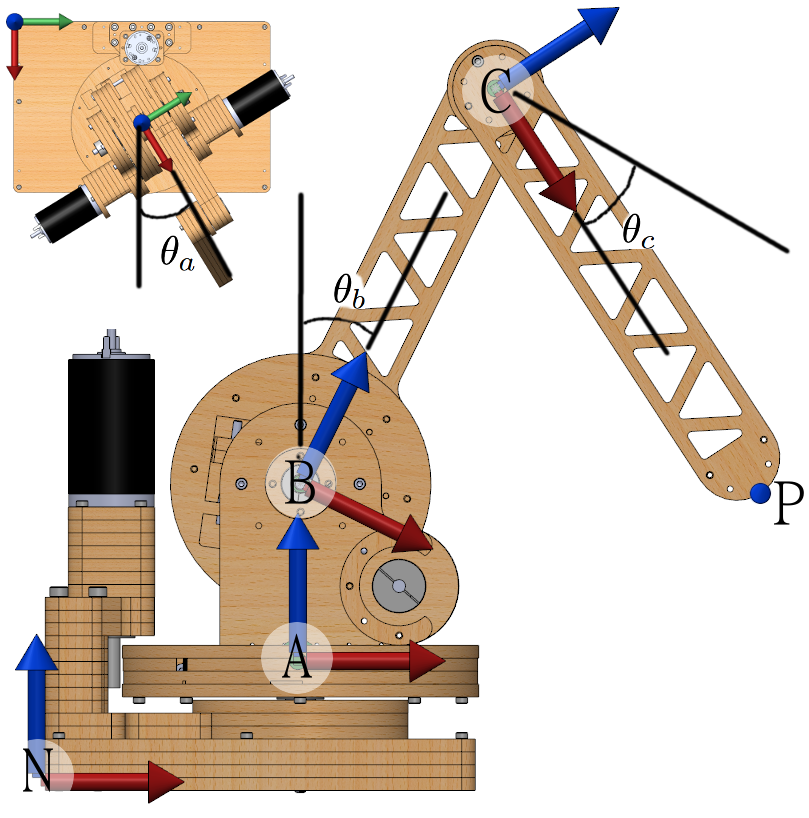
What would WoodenHaptics kit be if you could only use the default design? As you modify the design, i.e. by changing the length of the device's bodies, you have to let the software know so that it can compute the correct position and forces. In addition you have to set or tune parameters that will affect how objects will be rendered with your device. The most importat property here is the stiffness constants, which set too low will render objects very "mushy" and too high might cause unwanted vibrations. The first time you start the device it will create a file in your home folder called woodenhaptics.json. Edited this file with a text-editor (e.g. "gedit"). It's default content is (without the unit column):

{                                       Unit
  "diameter_capstan_a":       0.01,     m
  "diameter_capstan_b":       0.01,     m
  "diameter_capstan_c":       0.01,     m
  "length_body_a":            0.08,     m
  "length_body_b":            0.205,    m
  "length_body_c":            0.2,      m
  "diameter_body_a":          0.16,     m
  "diameter_body_b":          0.12,     m
  "diameter_body_c":          0.12,     m
  "workspace_origin_x":       0.22,     m
  "workspace_origin_y":       0,        m
  "workspace_origin_z":       0.08,     m
  "workspace_radius":         0.1,      m
  "torque_constant_motor_a":  0.0603,   A (see motor datasheet)
  "torque_constant_motor_b":  0.0603,   A
  "torque_constant_motor_c":  0.0603,   A
  "current_for_10_v_signal":  3,        A
  "cpr_encoder_a":            4096,     Quadrupled Counts Per Revolution
  "cpr_encoder_b":            2000,     Quadrupled Counts Per Revolution
  "cpr_encoder_c":            2000,     Quadrupled Counts Per Revolution
  "max_linear_force":         12,       N
  "max_linear_stiffness":     5000,     N/m
  "max_linear_damping":       8,        N/(m/s)
  "mass_body_b":              0.17,     Kg
  "mass_body_c":              0.11,     Kg
  "length_cm_body_b":         0.051,    m to center of mass from body a
  "length_cm_body_c":         0.091,    m to center of mass from body b
  "g_constant":               9.81      m/s^2; 0 = no gravity compensation
}

PC/Ubuntu Setup Guide

We recommend using Ubuntu 14.04. If you start with a fresh install of Ubuntu, you probably first want to enable proprietary graphics drivers (search for "Additional Drivers" in the start menu). This to ensure nice 3D graphics framerates. We have successfully used a computer with low-end AMD Athlon 5350 APU (a CPU with built-in GPU).

 0. Install dependencies:
    sudo apt-get install build-essential libusb-1.0-0-dev \
                 freeglut3-dev libasound2-dev gcc-multilib

 1. Get Chai3D:
    wget http://web.stanford.edu/class/cs277/resources/downloads/chai3d-3.0.0-Makefiles.tar.gz
    tar -xzvf chai3d-3.0.0-Makefiles.tar.gz

 2. Copy in Chai3D woodenhaptics extension:
    wget http://csc.kth.se/~jofo02/chai3d-3.0.0-woodenhaptics-extension.zip
    unzip chai3d-3.0.0-woodenhaptics-extension.zip
    cp -r chai3d-3.0.0-woodenhaptics-extension/* chai3d-3.0.0/

 3. Compile:
    cd chai3d-3.0.0
    make -j5

 4. If you have not installed the Sensoray drivers before:
    cd chai3d-3.0.0/external/s826
    tar -xjvf sdk_826_linux_3.3.7.tar.bz2
    cd sdk-826-3.3.7_linux
    make modules
    sudo make install
    modprobe s826
Bill of Materials

 
The complete and updated list of components used or Bill of Materials, can be found on this Google spreadsheet: WoodenHaptics Bill of Materials

Recommended Tools


Please refer to the Bill of Materials for a list of tools that we recommend you use with the kit.

GitHub Repository


The source for all drawings, schematics, software and even some data sheets are our GitHub repository: https://github.com/WoodenHaptics/TEI_2015/